I’ve had a fascination with computers since first encountering the
now legendary ZX 81's and Spectrums that Clive Sinclaiir introduced boldly into the Home
Computer Market, way back in the early 1980's.
In retrospect, these machines were simple and incredibly crude by
today's standards. Yet for me they sowed the seed of a progressive interest in computers.
 Ten
years or so have gone by and I am now at University studying Fine Art
Printmaking. One day my tutor referred to something known as the 'Quadra'
- the Quadra is a computer. Well I just had to give it a try.
Ten
years or so have gone by and I am now at University studying Fine Art
Printmaking. One day my tutor referred to something known as the 'Quadra'
- the Quadra is a computer. Well I just had to give it a try.
My first experimentation with the Quadra was rather clumsy. When I
transferred the work to the medium of screenprint the results were disappointing. But I
wasn't going to be beaten that easily. I had got my the 'foot-in-the-door' and from then
on my proficiency grew. I spent the remainder of the course moving between the computer
screen and the screenprinting-beds.
There was a basic system I devised, for process my work using the
Quadra; firstly after gathering together the images needed for my work, I transferred them
through a scanner to form a digital representation on a monitor. Once within a Programme
such as Photoshop, I could control and rework these images into what was required, which
usually entailed cutting and pasting. After reaching a finishing point, the work was
printed out in a standard black and white format.
The black and white printouts were then Photocopied onto either
equivalent sized sheets of plain Acetate or Tracing paper (doubling-up photocopies
increases the image density, result-ing in a stronger Stencil on the Silk Screen) The next
step is to expose a silkscreen coated with Light-Sensitive Emulsion on an Ultra-Violet
Light-Box. Once exposed for the correct dura-tion of time the screen is sprayed with water
to wash out any undeveloped photo-emulsion.
 After
drying the silkscreen, brown gum-tape is moistened and placed along
where the silk meets the frame. This tightens the silkscreen against
the frame and also stops ink from run-ning into any gaps along the edges.
Light-holes in the stencil are covered using Blue-Filler. This prevents
ink coming through where it's not needed. The screen is now ready to
print.
After
drying the silkscreen, brown gum-tape is moistened and placed along
where the silk meets the frame. This tightens the silkscreen against
the frame and also stops ink from run-ning into any gaps along the edges.
Light-holes in the stencil are covered using Blue-Filler. This prevents
ink coming through where it's not needed. The screen is now ready to
print.
Problems can and do arise. For example the dot size of the computer
printout may be too fine for the mesh size of the silkscreen. When photocopying, the
acetate heats up and expands sometimes causing slight image distortion. As a result two
identical acetates may not align completely when overlaid. It is important to use a good
photocopier that gives clear solid contrast and definition and doesn't leave tone lines on
the copyprint. Computer printouts usually come in A4 and A3 size. This can limit the size
of the final print. Larger images can be achieved using a Copy-Camera and Photographic
film known as 'Kodalith'
All-in-all, the fascination for me is, once you have grasped the
process, ideas can be manipulated in increasingly complex ways. The computer gives the
artist a new and interesting tool to develop his/her vision.
David Kaye can be contacted at:
94 Marlborugh Ave,
Hull HU5 3JT
England
Tel: 01482 346969
 The information resource
for printmakers
The information resource
for printmakers 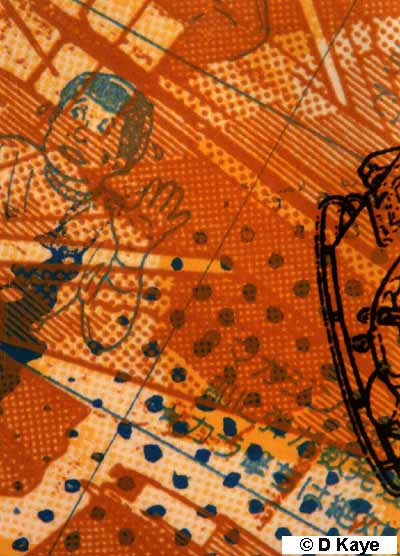