COLOR IN INTAGLIO PRINTS WITH PAPER
By John D. Gall
 As
far back as my first etching class at Guilford College, I became excited
with the concept of the "chine colle" (Chinese collage). Almost
every print I create uses this colle process or some derivation.
As
far back as my first etching class at Guilford College, I became excited
with the concept of the "chine colle" (Chinese collage). Almost
every print I create uses this colle process or some derivation.
The simplest colle is done by placing a precut, thin colored paper on top of a wiped
intaglio plate. I cut the paper precisely to cover the inside edge of the beveled plate.
The colle
paper is dampened and sprinkled with a fine coating of powered wheat paste glue. The
actual printing paper (Rives BFK or other) is then carefully laid over the plate (with
colle paper on top) and run through the press. This effect alone adds a whole new
dimension to an etching.
There are two steps of the technique that demand attention. First, when cutting and
dampening the colle paper you must allow for paper expansion. You should "test"
it for size before sprinkling with glue and trim as necessary. Secondly, when applying the
glue, shake it out of a container thinly and evenly over the colle paper.
 YOU
DON'T NEED MUCH. It is best to sprinkle the colle paper with glue
YOU
DON'T NEED MUCH. It is best to sprinkle the colle paper with glue
before the final placing upon the plate. I have done hundreds and hundreds of colles using
this method with very few failures. I use a plastic container (about 6"x2")
covered with a couple layers of tarlatan for the glue applicator. If you use proper press
pressure and do not over sprinkle you will not ever have a problem with glue "oozing
out" around the edges and will have excellent bondage.
You can expand the concept to include doing several colles within a single print. I
call this method "multi-colle". Specifically, you can place papers on selected
areas or images of the plate. A colle paper cut to the plate size can then be used, or not
used, before laying the final (backing) paper upon the plate.
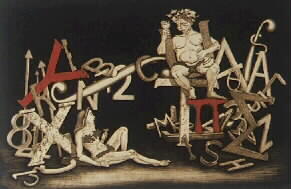
 Perhaps
the most exciting reason to use the colle process is not only can numerous
colored papers be used, but you may create your own, or use various
other printed material. I often use maps, dictionary pages, or text
book pages, but be aware of the quality and acidity of the papers you
select. Using these items can also encourage production of unique prints,
either as variable editions, or as monoprints.
Perhaps
the most exciting reason to use the colle process is not only can numerous
colored papers be used, but you may create your own, or use various
other printed material. I often use maps, dictionary pages, or text
book pages, but be aware of the quality and acidity of the papers you
select. Using these items can also encourage production of unique prints,
either as variable editions, or as monoprints.
Let me explain a few important aspects of doing multi-colles. To be consistent if
editioning, I make a template for each piece placed upon the plate. I use tracing paper to
transfer the area or image from the plate to a thin cardboard template, which will in turn
be used to cut out the colle paper. To begin, I assemble the papers on the plate off the
press bed, placing it on the press bed only when completed. I normally use a colle paper
over the full plate as well as several cut pieces in selected areas on the plate. The only
way I have found to successfully do this is to first place the dampened and sprinkled full
paper on the plate, place 2 or 3 small weights on one side to keep it in position, and
then carefully lift and fold it back exposing the plate again, allowing you to then place
the other dampened and sprinkled cut pieces on the plate.
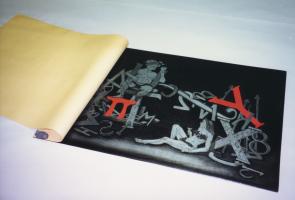 After
the cut pieces are placed, fold the full paper slowly and carefully
back over the plate. Place this "sandwich" of papers on the
press bed, lay the backing paper (BFK or other) over the assemblage
and run it through the press. Dampening of all the paper is important
because it allows the paper to lie flat on the plate as well as improve
the printing quality. Depending on the papers and colors you use, intense,
bright colors are easily obtained. Please visit my web site to see additional
images and my personal artist statement.
After
the cut pieces are placed, fold the full paper slowly and carefully
back over the plate. Place this "sandwich" of papers on the
press bed, lay the backing paper (BFK or other) over the assemblage
and run it through the press. Dampening of all the paper is important
because it allows the paper to lie flat on the plate as well as improve
the printing quality. Depending on the papers and colors you use, intense,
bright colors are easily obtained. Please visit my web site to see additional
images and my personal artist statement.
http://home.att.net/~jgallart
jgallart@worldnet.att.net
 The information resource for printmakers